# Hardware & Software Inspection
## Login to the Hextronics Control Panel
* Scan the QR code located within the black accessories folder
* Find the link within the Hextronics welcome email
#### Password:
* The password will be within the URL, everything **within** the parenthesis (Hexone-xxxxxxxxxxxx).hextron.tech/login of your unique URL.
* Once you've logged in you can select "Change Password" on the top of your screen if you prefer to do so.
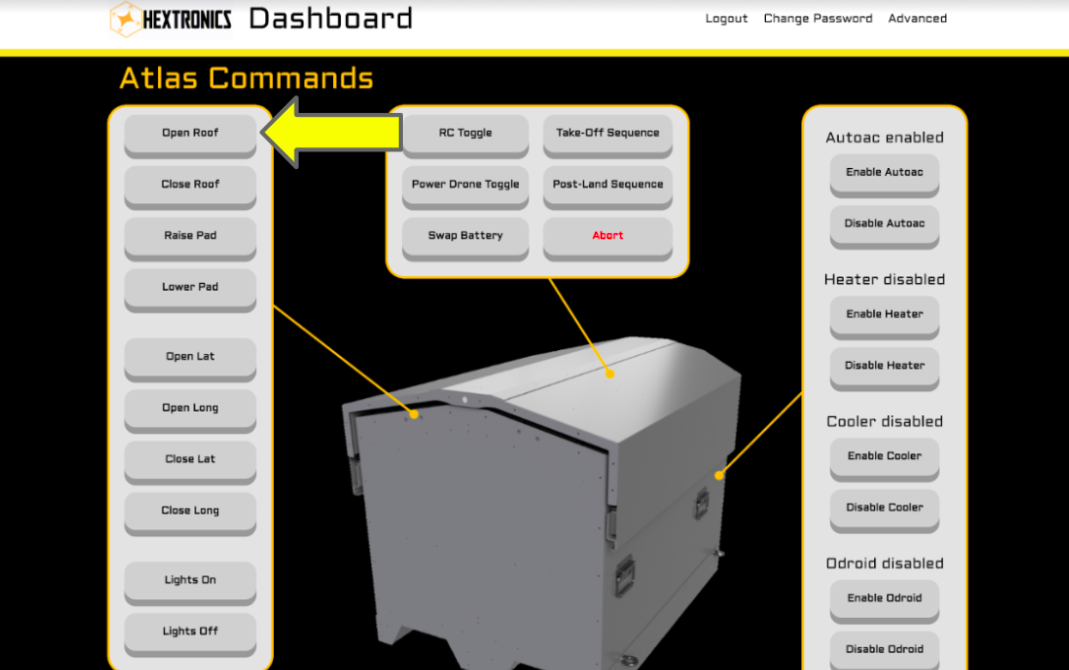
## Select "Open Roof"
#### 1 of 2:
#### 2 of 2: Visually confirm that:
* The roof opens smoothly and fully
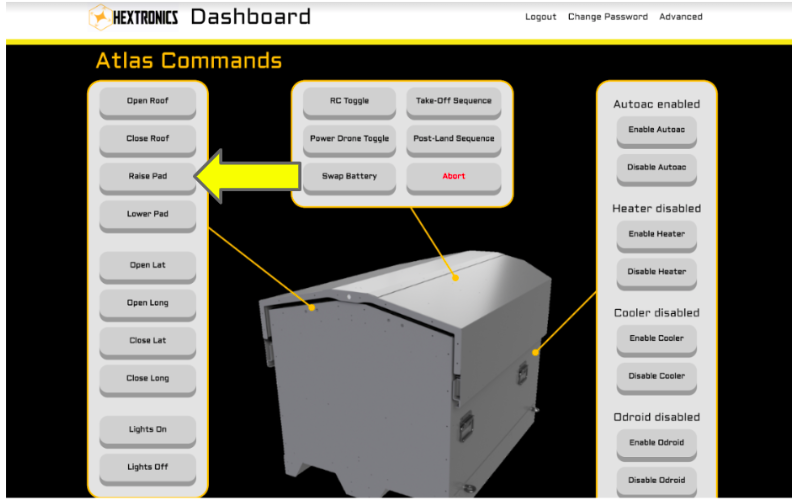
## Select "Raise Pad"
#### 1 of 2:
#### 2 of 2: Visually confirm that:
* The Pad Raises all the way up
## Place drone on the landing pad
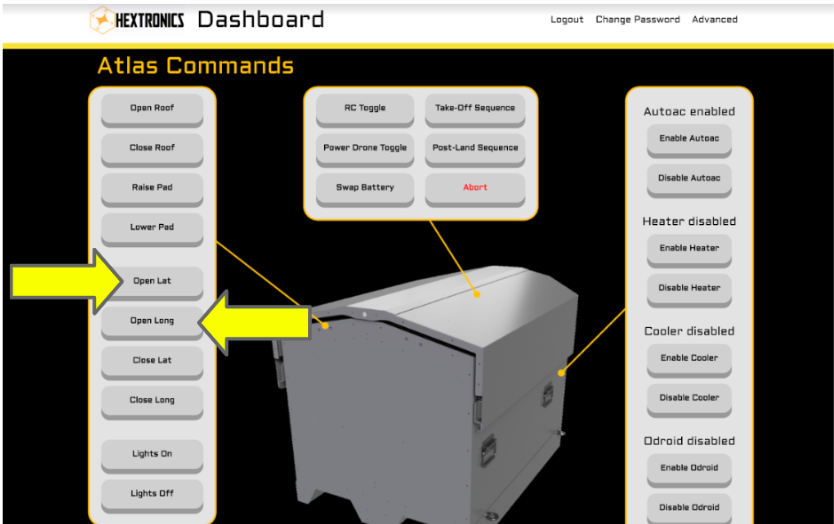
## Select "Close lat long"
#### 1 of 2:
#### 2 of 2: Visually confirm that:
* The adjusters move internally to center the drone.
## Select "Lower Pad"
#### 1 of 2:
#### 2 of 2: Visually confirm that
* The pad lowers the drone into the station
* and that the drone propellers safely retract towards the center of the drone
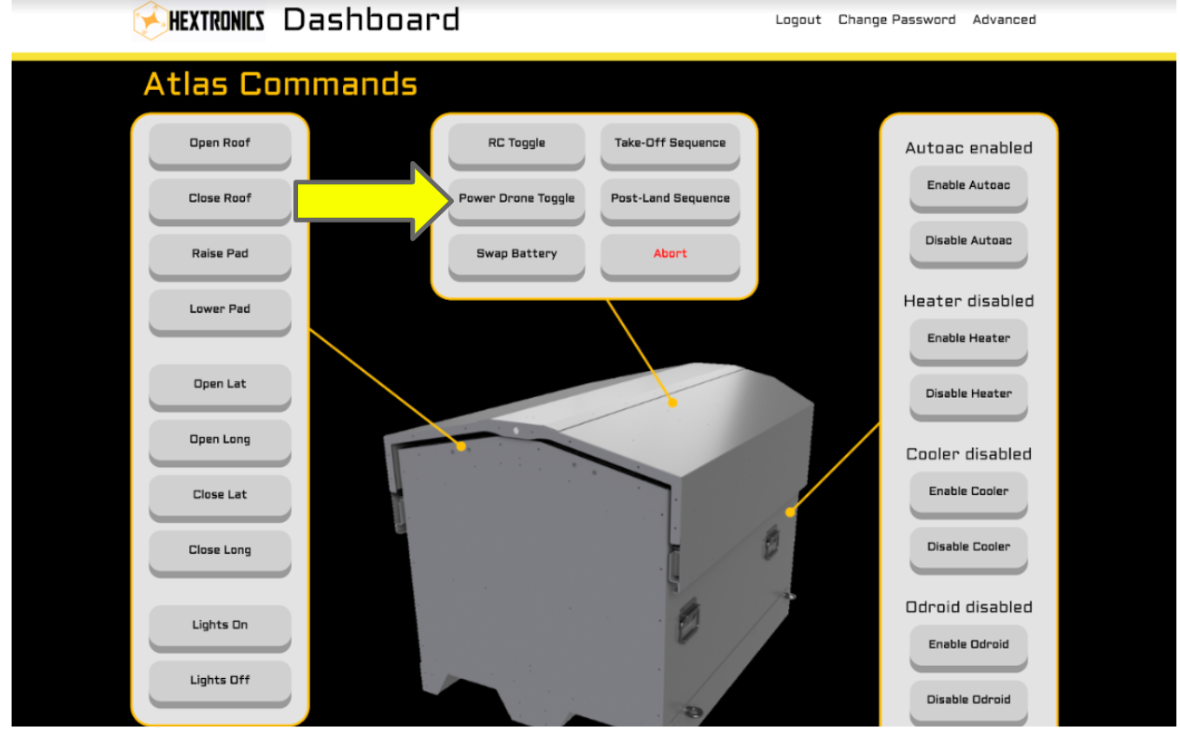
## Select "power drone toggle"
#### 1 of 2:
#### 2 of 2: Visually confirm that:
* The power ON/OFF mechanism successfully presses the button and powers ON/OFF the drone.
## Select Swap battery
#### 1 of 2:
#### 2 of 2: Visually confirm that:
* Battery removal is successful
* Battery insertion is successful
## If all processes were successful please close the roof and continue to the next steps.